Table of Contents
In this series we will build from scratch a Continuous Training System. However, to keep things simple, we will use a toy example and run the system locally. In a real-world scenario, the system would be deployed in a cloud environment and the data would be stored in a distributed storage system.
1. Continuous Training
The process of generating a machine learning model usually consists of training on a dataset, evaluating its performance and then deploying it to a production environment. In certain scenarios, the trained model may perform consistently over a long period of time. However, that is not always the case. There are multiple reasons you may want to retrain it periodically, such as:
- Stay competitive: as more data becomes available, the model can be retrained to take advantage of it, gaining a competitive edge thanks to the improved performance.
- Data drift: in training a model, it is assumed that the training data is representative of future unseen data. Nevertheless, this may not always hold. For instance, we trained a model to estimate the camera parameters for broadcast soccer games. But when the pandemic led to camera angle changes in order to avoid showing empty stadiums, the data distribution changed.
- Concept drift: the relationship between the input features and the target variable can evolve. We trained our camera model to predict the camera pinhole parametrisation. The model we trained our model to predict the parametrisation given by the camera pinhole paradigm. However, if TV producers switch to fish-eye lenses for a different viewer experience, the input/output mapping would no longer be valid.
The process of automatically retraining a model on a regular basis is known as Continuous Training. It is a key component of a machine learning system that aims to keep the model’s performance at an optimal level over time. The following diagram depicts the different components that make up a Continuous Training System:

We have the following agents/components:
- User: customer that sends requests to the endpoint in order to get predictions back.
- Endpoint: the model’s API, which forwards the requests to the model and sends back the predictions. Furthermore, it stores both the pairs of queries and predictions to the data lake.
- Labelling: process used to manually annotate the data and review the model’s predictions. This allows us to have high quality data on a continuous basis that we can use to capture the data drift and retrain the model.
- Data Lake: storage system that stores the high quality data used for training.
- Orchestrator: component that watches the data lake and triggers the retraining process when certain conditions are met.
- Training: process that takes the data in the data lake and generates a new model as an output artifact.
In this article we will focus on the Labelling, Training and Endpoint components.
2. Data collection
A key element of any machine learning project is the data. At its core, AI models ingest vast amounts of data and are tasked with recognizing patterns and finding insights. Assuming the data used for training was representative of the real world, one can then expect the trained model to make accurate predictions on unseen scenarios.
But how do you get that data? Well, you may be able to use publicly available datasets. However, you may find it hard to build a moat around your business if you are using the same data as everyone else. Moreover, it is unlikely that you will be able to find a dataset that is perfectly suited to your specific problem. In many cases, you will need to collect your own data.

This is where data collection comes in. In this blogpost we will build a web application that allows users to label images of cats and dogs. We will be using React and Node.js. This application plays a twofold role:
- It allows us to collect the data used for training the initial model.
- It allows to review and correct model predictions that are fed back into the retraining process.
All the code is available at the following public repository:
 Auxiliary repository
2.1. Frontend
First of all, let’s start with a warning. I had never used React before, so bear with me if the code is not as clean as it should be. Luckily, I had the assistance of Copilot, which helped me a lot with the boilerplate code. I still can’t get my head around the fact that I was able to build a web application from scratch in just a couple days as a complete newbie.
That clarified, let’s start with the frontend. We will be using React, a JavaScript library for building user interfaces. We will assume the images to be labelled are stored in a given directory. Our app will then iterate through the images and display them one by one. The user will then be able to label each image by clicking on a button.
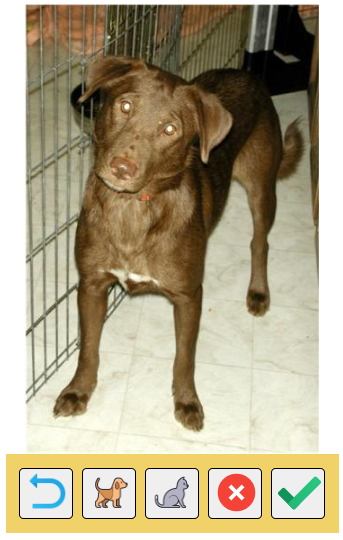
Its use is fairly intuitive: you can mark the image as cat/dog, or mark it to be deleted if it does not correspond to any of the two classes. You can also use the keyboard shortcuts C and D to mark the image as cat/dog, and R to mark it as to be deleted. Once you are done, click on Save (Right Arrow) to save the labels to disk and move to the next image. You can also go back to correct mistakes clicking on Previous (Left Arrow).
2.2. Backend
The backend is a simple Node.js server that serves the frontend and handles the requests to save the labels. It is built using Express, a minimal and flexible Node.js web application framework that provides a robust set of features for web and mobile applications. It has three main endpoints:
/filelist: it returns a list of the available images to be labelled./files/{filename}: it serves the image specified by its filename to be labelled./label: it saves the labels to disk.
And that’s it! If you want to give it a try, just clone the repo, drop your images in the data/frames folder and label them using the labeler tool. To run it, execute the following command:
./scripts/serve.sh
Then, open your browser and go to http://localhost:3000/. The data/annotations folder will populate with the labels you have assigned to the images.
3. Training Pipeline
In this section we will focus on the Training component. It carries out a sequence of steps that takes the data in the data lake and generates a new model as an output artifact. The pipeline is composed of the following steps:
- Training: the process of learning the best weights that minimize the error between the predictions and the ground truth in the training set, while being able to generalize to unseen data.
- Evaluation: the process of comparing the performance of the newly trained model against a baseline model in order to find out if there is an improvement.
- Validation: a final step to ensure that the model is able to generalize to unseen data.
- Registry: if all previous steps are successful, the model is stored, ready to be deployed.

Lets us now focus on the two key components that carry out the core functionality of the pipeline. All the code is available at the following public repository:
Auxiliary repository
3.1. Training
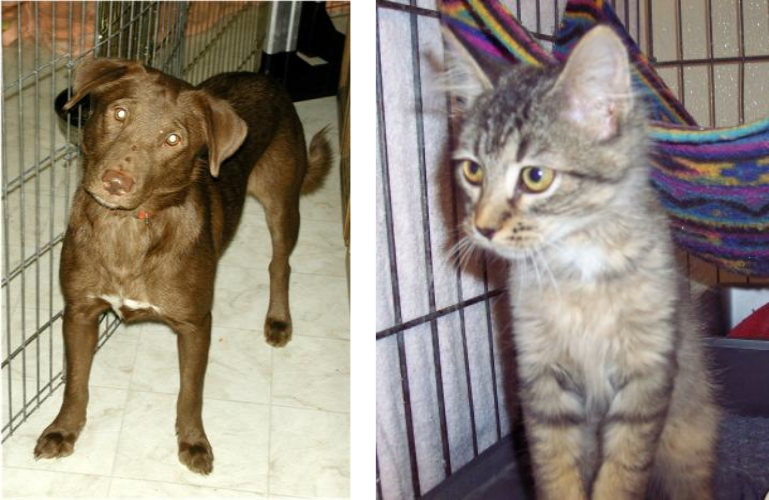
We will try to keep things as simple as possible. In that spirit, our aim is to build a Dog & Cat classifier. The starting dataset can be found in the data folder consisting of:
- Images: 10 comprised of 10 photos of cats and dogs, located in
datasubfolder. - Labels: 10 corresponding labels stored as
.json, located inannotationssubfolder.
We will be using the torch library. The main components we defined are:
Dataset: reads the images and labels from the disk and returns them as a tuple. It resizes the images to a fixed size, converts them to grayscale and normalizes them.Model: defines the model architecture, which consists of a simple fully connected layer followed by a sigmoid activation function.Loss: we will use the binary cross-entropy loss.
To see the training in practice, you can download a sample dataset here. Extract the contents of the file in the data directory. To do so, run:
tar -zxf cats_and_dogs.tar.gz -C data/
Then make sure you have poetry installed and set up the environment running:
poetry install
First, we need prepare the dataset by creating the 3 splits for train/val/test:
poetry run python -m animal_classifier dataset-split data/train.csv data/val.csv data/test.csv --train-frac 0.6 --val-frac 0.2 --test-frac 0.2
We will use the train set to fine tune the model weights, and the val set for early stopping. Run the following command to get the trained model, which will be stored in the models folder:
poetry run python -m animal_classifier training data/train.csv data/val.csv --annotations-dir data/cats_and_dogs/annotations --model-dir models/cats_and_dogs
The model is now ready to be used for inference. To test it on an image, simply run
poetry run python -m animal_classifier inference 1.png base_model.pth --frames-dir data/cats_and_dogs/frames --model-dir models/cats_and_dogs --threshold 0.5
3.2. Evaluation
Before deploying the model, we need to evaluate its performance. For that purpose, we have an evaluation module that receives a model and a dataset. It computes a summary metric, the average binary cross-entropy loss. We will carry out two steps:
- Comparison against a baseline model: to ensure the new model outperforms the current one, we compare the metric on the same dataset. As an example, we can compare the two models provided by the training step in previous section:
latest(all epochs) andbest(early stopping).
poetry run python -m animal_classifier evaluation base_model_latest.pth base_model.pth data/test.csv --annotations-dir data/cats_and_dogs/annotations --model-dir models/cats_and_dogs
- Validation: to ensure the model is able to generalize to unseen data.
poetry run python -m animal_classifier validation base_model.pth data/test.csv --annotations-dir data/cats_and_dogs/annotations --model-dir models/cats_and_dogs --min-accuracy-validation 0.5
3.3. Model Deployment
So after training our model, making sure it outperforms the baseline and gaining confidence about its generalization to unseen data, what’s next? It’s time to deploy it!

Bear in mind that our model is simply an artifact, a file that contains the weights of the model. In order to make predictions, we need to wrap it in an API. We will use the torchserve library. The process goes as follows:
- Model Archiver: we need to create a
.marfile that contains the model and the code to run it:
poetry run torch-model-archiver --model-name animal --version 1.0 --model-file animal_classifier/models/model.py --serialized-file ./models/cats_and_dogs/base_model.pth --handler animal_classifier/api/torchserve/handler.py --export-path ./model_store/
- Settings: we define the settings for the server in a
config.propertiesfile, like the one below:
inference_address=http://127.0.0.1:8080
inference_address=http://0.0.0.0:8080
management_address=http://0.0.0.0:8081
metrics_address=http://0.0.0.0:8082
model_store=./model_store/
load_models=animal.mar
min_workers=1
max_workers=1
default_workers_per_model=1
model_snapshot={
    "name":"startup.cfg",
    "modelCount":1,
    "models":{
        "animal":{
            "1.0":{
                "defaultVersion":true,
                "marName":"animal.mar",
                "minWorkers":1,
                "maxWorkers":1,
                "batchSize":2,
                "maxBatchDelay":100,
                "responseTimeout":30000,
            }
        }
    }
}
config.properties for clarity. However, the model_snapshot must be a single line without spaces, as in the original file.
Torchserve provides a batching mechanism out of the blue. It tries to group the incoming requests until one of the following conditions is met:
- The batch is filled with
batchSizerequests. - The time since the first request in the batch exceeds
maxBatchDelaymilliseconds.
- Containerization: we can use Docker to containerize the server. You can check the details in the
docker/Dockerfile.torchservefile. To build it, simply run
docker build -t animal_classifier_torchserve:latest -f docker/Dockerfile.torchserve .
- Deployment: we can deploy the container by running:
docker run --rm -p 8080:8080 -p 8081:8081 -p 8082:8082 -v ./model_store:/source/model_store animal_classifier_torchserve:latest
And that’s it we’re done! You can check the model is running by executing the following command:
curl http://localhost:8081/models/animal
We can now send requests to the endpoint and get predictions back:
- Single request
curl http://localhost:8080/predictions/animal -T ./data/cats_and_dogs/frames/1.png - Concurrent requests for batch processing:
curl -X POST http://localhost:8080/predictions/animal -T ./data/cats_and_dogs/frames/1.png & curl -X POST http://localhost:8080/predictions/animal -T ./data/cats_and_dogs/frames/2.png
3.4. Proxy Deployment
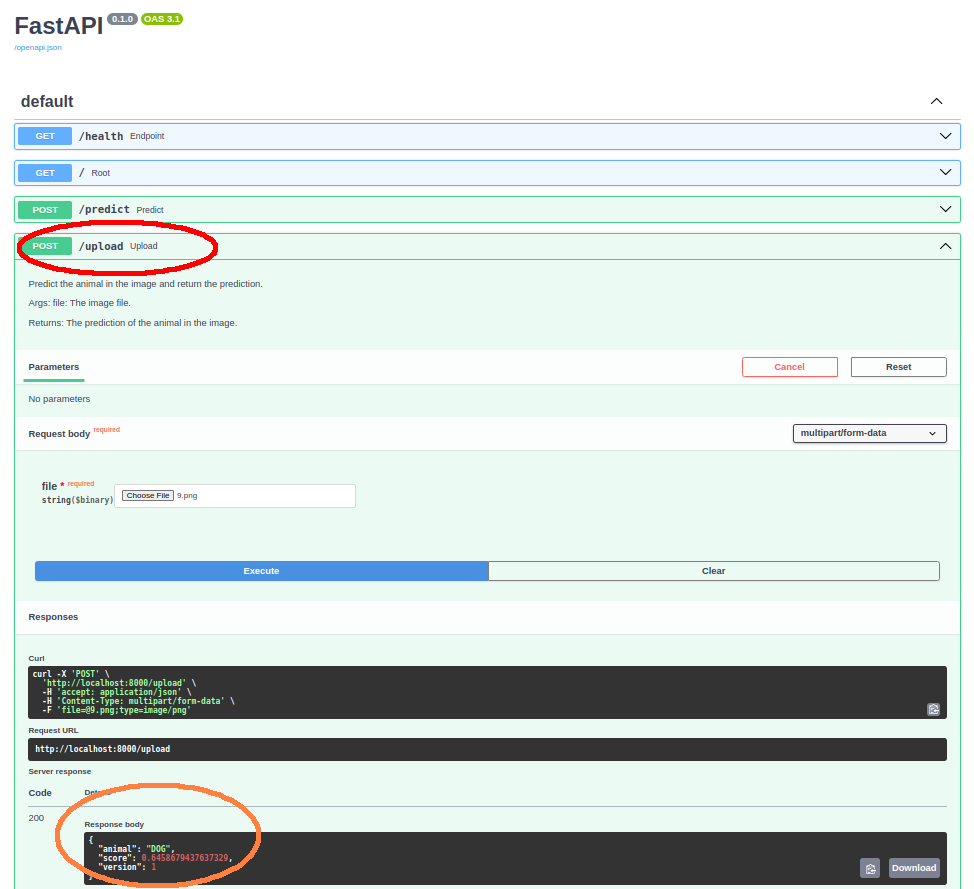
There’s one last issue though. When we try to hit the torchserve endpoint from the labelling app, we get a CORS error indicating it has been blocked by CORS policy. We will solve it by adding a FastAPI server that acts as a proxy to the torchserve endpoint. This will come handy since it gives as a WebUI to interact with the model. Furthermore, we will also leverage it for canary rollouts as we will see in a future post.
To deploy it, simply run:
docker run --rm -p 8000:8000 -v ./config:/source/config animal_classifier_fastapi:latest
Now you can go to http://localhost:8000/docs in your browser, where you’ll get a UI that allows you to upload images and get predictions back.
4. Putting it all together
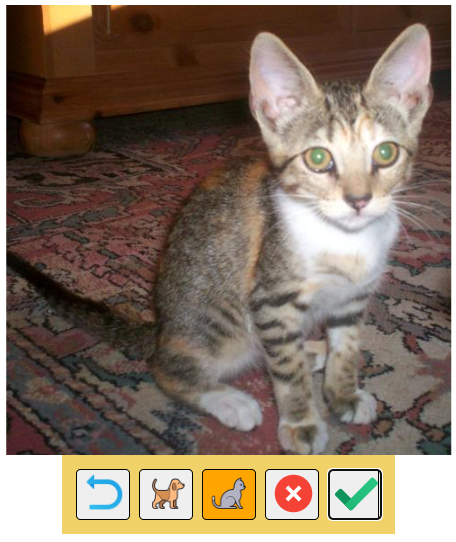
Once we have a trained model, we can point the Labelling App to it. In this fashion, when a new image is queried, the app will hit the model to get an initial prediction. This prediction will be displayed to the user, who can then correct it if necessary.
This requires spinning up the three components we have discussed: labelling app, model predictor and proxy. You can do so by cloning both repos into a folder and adding the following manifest in there:
version: '3'
services:
  fastapi:
    container_name: fastapi_container
    image: animal_classifier_fastapi:latest
    ports:
      - "8000:8000"
    volumes:
      - ./animal_classifier/config:/source/config
    networks:
      - mynetwork

  torchserve:
    container_name: torchserve_container
    image: animal_classifier_torchserve:latest
    ports:
      - "8080:8080"
      - "8081:8081"
      - "8082:8082"
    volumes:
      - ./animal_classifier/model_store:/source/model_store
    networks:
      - mynetwork

  labeller:
    container_name: labeller_container
    image: animal_labeller:latest
    ports:
      - "3000:3000"
      - "3001:3001"
    volumes:
      - ./animal_labeller/data:/usr/src/app/data
    networks:
      - mynetwork

networks:
  mynetwork:
Then, run the following command to start the services:
docker-compose up -d
And go to http://localhost:3000/ in your browser. You will be able get predictions back from the model and review them.
5. References
- MLOps: Continuous delivery and automation pipelines in machine learning, by Google Cloud.